You can try the following:
- Check the spelling
- Try another search
You can try the following:

To use the DigiD app, it must first be activated.
Below you can read how you can do this.
It is also possible to watch a video made by DigiD on how to set up the app:
Instructional video for activating the DigiD app via a letter
You need proof of identity to activate the app. This could be your driver's license, ID card or passport.
You also need a device with NFC operation.
Does your phone not have an NFC reader? Then you can still activate the DigiD app with the CheckID app.
Here's how that works: CheckID from DigiD
Download the app on your phone or tablet.
If you use an Android device (Samsung, Nokia, OnePlus), you do this via the Google Play Store DigiD app Android
If you use an iOS device (iPhone or iPad), you do this via the Apple App Store DigiD app iOS
After installing you can open the app.
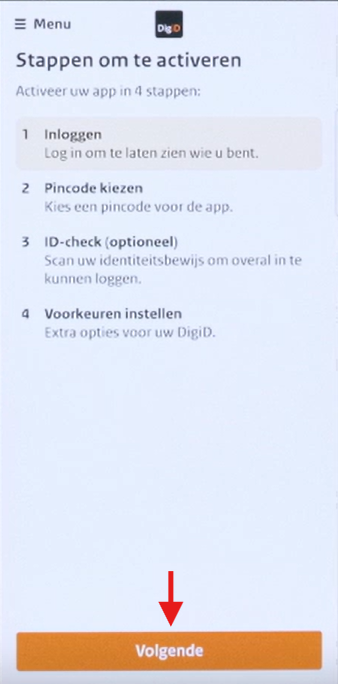
When you open the app you will see the steps you need to follow to activate the app. When you have read everything, press 'Next one'.
Now log in with your DigiD username and password. Then press 'Next one'.
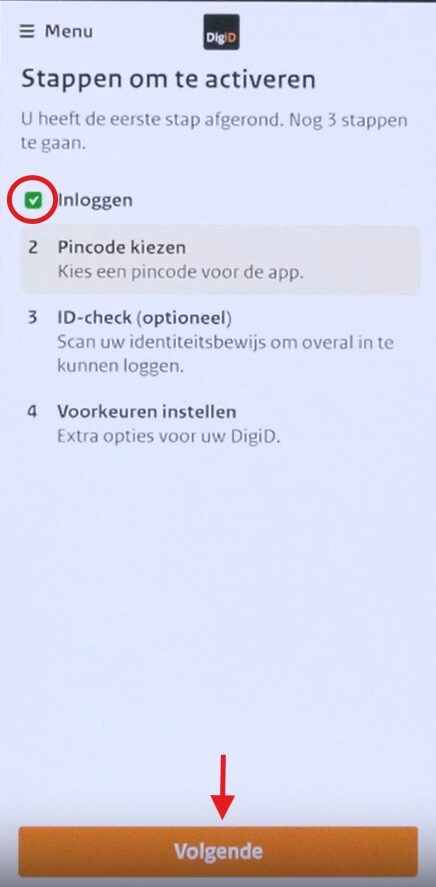
Now you will activate the app. You will now see in the step overview that you are logged in. Press 'Next one'.
You can now come up with a PIN code. You will need this code in future to unlock the DigiD app. You must enter this code twice to avoid errors.
If both codes match, you will automatically return to the step overview. Press again 'Next one'.
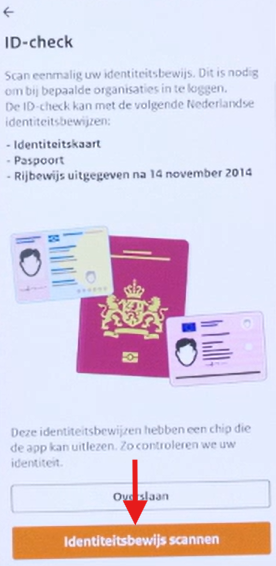
Now you can perform the ID check. This is optional.
Grab the ID you want to use and press 'Scan ID'.
Now hold your ID on the back of your phone. If the app recognizes your ID, you will see that your ID is being scanned in the app.
Don't see this message? Then move your ID
until you see the notification and see the percentage go up to 100 percent.
Then you will get the 'Preferences' page to see. Here you can indicate whether you want to receive messages from the app.
The slider is automatically raised 'On'. Then press 'Next one'.
If you do not yet have an email address, you can enter it now or skip it by clicking 'I don't want to provide an email address' to click.
If you have provided an email address, a verification code will be sent to your email. Enter the code in the app and press 'Next one'.
You will be notified that your email address has been verified. Press 'OK' and then on 'Finished!'.